How to Clean AC Coils?
Dirty AC coils are one of the most common reasons air conditioners fail in Dubai. The constant dust, sand, and desert climate create the perfect storm for clogged coils. The good news? You can clean them yourself with the right guidance, potentially saving hundreds of dirhams on professional service calls. Here is a quick answer of cleaning AC coils:
To clean AC coils, first turn off the power to the unit for safety. Remove the outer cover and gently brush away dust and debris using a soft brush or vacuum. Spray a coil cleaner or a mild detergent solution onto the coils and let it sit for a few minutes to loosen dirt. Rinse lightly with water if required (for outdoor units) or wipe carefully for indoor coils, avoiding excess moisture. Allow the coils to dry completely before restoring power. Regular cleaning improves cooling efficiency and helps reduce energy consumption.
Let’s walk through everything you need to know about cleaning your AC coils properly and safely.
Understanding Your AC Coils
Before you grab your tools, you need to understand what you’re working with. Your air conditioner has two types of coils, and both need regular cleaning.
1. Evaporator coils
Evaporator coils sit inside your indoor unit. These coils absorb heat from your home’s air, making the air feel cool. They’re typically located behind an access panel on your indoor AC unit. Because they handle moisture, these coils are prone to mold and mildew growth alongside dust accumulation.
2. Condenser coils
Condenser coils live in your outdoor unit. These coils release the heat absorbed from your home into the outside air. They face constant exposure to dust, sand, leaves, and debris. In Dubai’s dusty environment, condenser coils can become completely clogged in just a few months.
When either type of coil gets dirty, your AC has to work much harder. Studies show that dirty coils can reduce your AC’s efficiency by 30% or more. That translates directly to higher electricity bills and a shorter lifespan for your expensive cooling system.
Symptoms of AC Coils Need Cleaning
How do you know it’s time to clean your coils? Your AC will give you clear warning signs if you know what to look for.
- Your energy bills have increased noticeably without any change in usage. Dirty coils force your system to run longer to achieve the same cooling, consuming more electricity. If your bills have jumped 20-30% compared to similar months last year, dirty coils might be the culprit.
- Your home isn’t cooling evenly or takes much longer to reach the set temperature. When coils can’t transfer heat efficiently, your AC struggles to maintain comfortable temperatures. Some rooms might feel warmer than others, or the entire house might never quite reach your desired temperature.
- Ice is forming on your indoor unit or refrigerant lines. This seems counter intuitive, but dirty evaporator coils can actually cause freezing. When airflow is restricted, the coils get too cold and ice forms, which makes the problem even worse.
- You notice a musty smell when the AC runs. Mold and mildew thrive on dirty, moist evaporator coils. That unpleasant odor gets blown throughout your home every time the AC cycles on.
If you’re experiencing any of these issues, cleaning your coils should be your first troubleshooting step. For persistent problems or if you’re uncomfortable doing it yourself, contact our professional ac coil cleaning service in Dubai.
What You Need Before Cleaning AC Coils?
Cleaning AC coils involves working with electrical components and chemicals, so safety isn’t optional. Before you begin, gather the right equipment and take proper precautions.
- Turn off all power to your AC unit at the breaker box, not just at the thermostat. Air conditioners run on 220-240 volts in Dubai, which can be fatal. Double-check that power is completely off before touching any internal components.
- Gather your supplies: a fin comb for straightening bent fins, a soft brush for gentle scrubbing, a spray bottle, commercial coil cleaner or a homemade solution, a garden hose with spray nozzle, shop vacuum with brush attachment, protective gloves and safety glasses, and a flashlight for seeing inside the unit.
- For cleaning solutions, you have options. Commercial no-rinse coil cleaners work well and are available at most hardware stores in Dubai. Alternatively, you can make an effective cleaning solution by mixing mild dish soap with warm water, or create a stronger solution with equal parts water and white vinegar for tougher buildup.
- Choose a mild day for this project if possible. Working on your outdoor unit during Dubai’s peak afternoon heat is miserable and potentially dangerous. Early morning or late afternoon provides more comfortable working conditions.
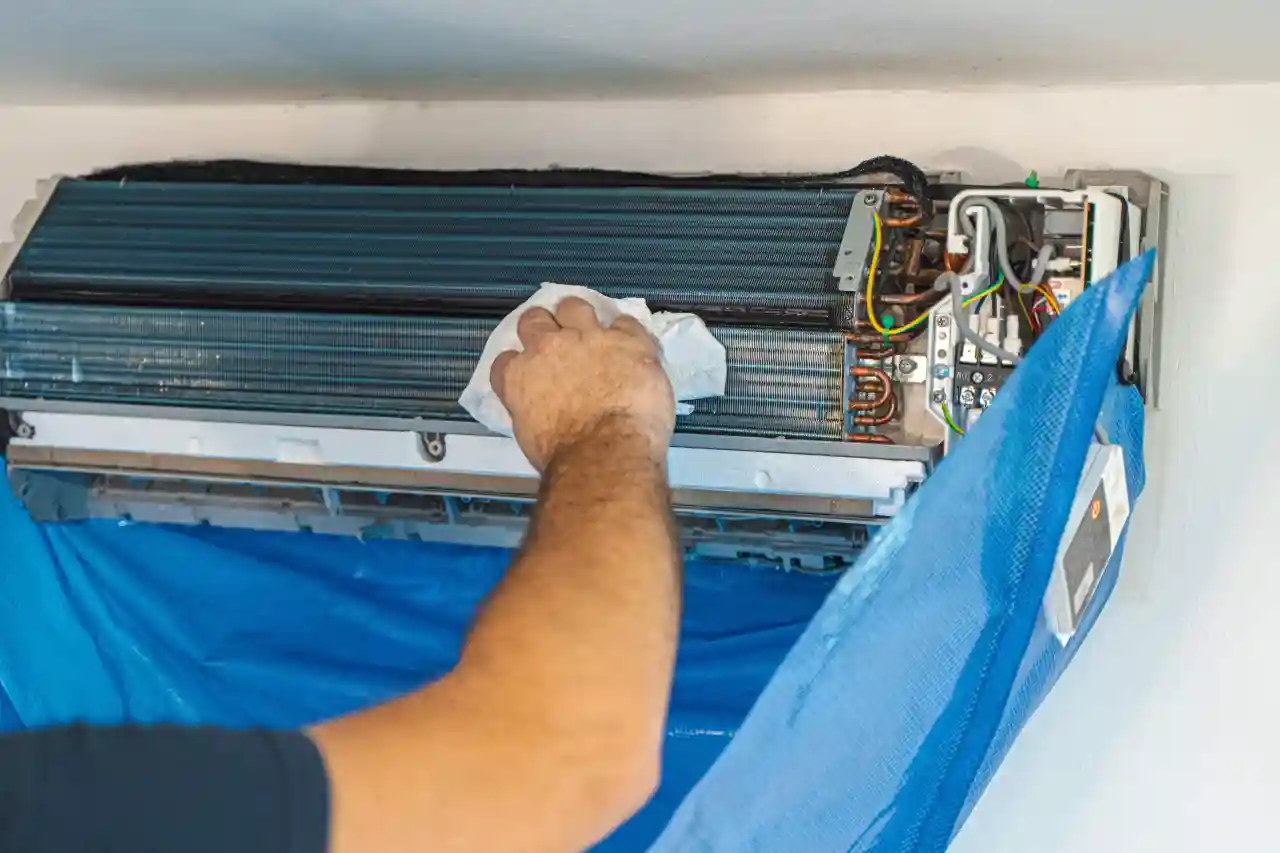
How to Clean AC Evaporator Coils?
Indoor evaporator coils require careful cleaning because they’re more delicate and surrounded by sensitive components. To clean your indoor evaporator ac coils, start by cutting power at the circuit breaker and confirming the AC is off. Remove the access panel to reach the coils, then gently brush away loose debris using a soft brush or vacuum, always moving in the direction of the fins. Apply your cleaning solution to all visible surfaces and let it sit for 5–10 minutes, rinsing with a spray bottle if required.
While you’re there, clean the condensate drain pan and flush the drain line with a water and bleach mix to prevent mold and clogs. Use a fin comb to straighten any bent fins, then allow everything to dry completely before reassembling the panel and restoring power. Here’s step by step guide on how to clean ac evaporator coil safely and effectively.
Turn off power completely
Locate your circuit breaker panel and flip off the breaker dedicated to your AC system. Verify power is off by trying to turn on the AC at the thermostat. Nothing should happen.
Access the evaporator coils
Remove the access panel on your indoor unit. This usually involves removing a few screws. Take a photo of the panel before removal so you remember how it goes back. The evaporator coils typically look like a series of thin metal fins arranged in rows.
Remove loose debris
Use a soft brush or the brush attachment on your shop vacuum to gently remove dust and debris from the coil surface. Brush in the direction of the fins, not against them. The fins are extremely delicate and bend easily.
Apply cleaning solution
Spray your chosen cleaning solution liberally on the coils. Make sure to cover all visible surfaces. If using a no-rinse commercial cleaner, follow the product instructions carefully. For homemade solutions, let the solution sit for 5-10 minutes to break down grime.
Rinse if needed
Some cleaners don’t require rinsing, while others do. If rinsing is needed, use a spray bottle with clean water to gently rinse the coils. Be very careful not to use too much water, as you don’t want to flood the drain pan below.
Clean the drain pan
While you’re in there, clean the condensate drain pan located beneath the coils. This pan collects moisture and often harbors mold. Wipe it clean and flush the drain line with a mixture of water and bleach to prevent clogs.
Straighten bent fins
Use a fin comb to carefully straighten any bent fins you notice. Bent fins restrict airflow and reduce efficiency. Work slowly and gently to avoid causing more damage.
Let everything dry completely before reassembling and restoring power. This might take an hour or more depending on humidity levels.
How to Clean AC Condenser Coils?
Outdoor condenser coils face harsher conditions and typically need more aggressive cleaning. The good news is they’re sturdier and easier to access than evaporator coils. To clean outdoor condenser coils, cut power at both the breaker and the unit’s disconnect box, then remove the outer panels and clear debris from around the base. Vacuum the coils from the inside out, apply coil cleaner and let it foam for 5–15 minutes, then rinse with a garden hose until the water runs clear. Finish by straightening bent fins, wiping down the fan blades, and confirming the drain is clear before reassembling.
Here are the detailed steps below:
Turn off power
Again, start by shutting off power at the breaker. Your outdoor unit also has a disconnect box nearby. Turn this off as an additional safety measure.
Remove the outer casing
Most outdoor units have a top grille that lifts off and side panels held by screws. Remove these carefully and set the hardware aside where you won’t lose it. You’ll now see the condenser coils wrapping around the unit’s interior.
Clear debris from around the unit
Remove leaves, grass clippings, and any debris from around the base of the unit. Clear at least two feet of space around the entire unit for proper airflow.
Vacuum the coils
Use your shop vacuum with a brush attachment to remove loose dirt and debris from the coil surfaces. Work from the inside of the unit outward if possible, which prevents pushing debris deeper into the fins.
Spray with coil cleaner
Apply commercial coil cleaner according to package directions, or use your homemade solution. Spray generously on all coil surfaces, making sure to penetrate between the fins. The cleaner needs to reach the dirt hiding between the fins.
Let it work
Allow the cleaner to sit for the recommended time, usually 5-15 minutes. You’ll see it foam up and start breaking down the grime. This is when the chemical action happens, so don’t rush this step.
Rinse thoroughly
Using a garden hose with a spray nozzle, rinse the coils from the inside out. Use gentle to moderate pressure. You want enough pressure to remove dirt but not so much that you bend the delicate fins. Keep rinsing until the water runs clear.
Straighten fins
Inspect the fins and use your fin comb to straighten any bent sections. Outdoor units often have bent fins from impacts or weather.
Clean the area
Wipe down the fan blades if accessible and remove any remaining debris from inside the unit. Check that the condensate drain is clear and flowing freely. Let the unit dry for at least an hour before reassembling and restoring power. Run the AC and monitor it for proper operation.
How Often Should You Clean Your AC Coils?
In Dubai’s dusty environment, AC coils need more frequent attention than in other climates. Here’s a realistic maintenance schedule for optimal performance.
Evaporator coils should be cleaned at least twice per year. The best timing is before summer begins in April or May, and again in September after the intense heat subsides. If you notice any of the warning signs mentioned earlier, clean them immediately regardless of schedule.
Condenser coils need cleaning every three months in Dubai due to the constant dust and sand. That means cleaning in March, June, September, and December gives you good coverage throughout the year. If you live near construction sites or in particularly dusty areas, monthly checks are smart.
Between deep cleanings, spend a few minutes each month doing quick maintenance. Spray off your outdoor unit with a garden hose to remove surface dust. Check that the area around the unit is clear of debris. Take a quick look at your indoor unit to ensure nothing looks obviously wrong.
This preventive approach costs you just a few hours per year but can extend your AC’s lifespan by 5-10 years and keep your energy bills under control.
In Conclusion
Clean AC coils are one of the simplest yet most effective ways to maintain your air conditioning system in Dubai’s harsh climate. By following this guide and staying on a regular cleaning schedule, you’ll enjoy lower energy bills, better cooling performance, and a longer-lasting AC system.
At Golden Spotless Technical Services we provide professional AC service in Dubai that provides peace of mind through expert diagnosis, proper repairs, warranty-protected work, and annual maintenance contracts that keep your system running efficiently year-round.
Read more related blogs: